
Apply non-woven wallpaper yourself
- judithmiddelkoop
- Jul 29, 2023
- 2 min read
Are you planning to apply non-woven wallpaper to your wall, but you don’t know exactly how to do this? I’d like to help you on your way! In this article, I share the steps you need to follow to make applying non woven wallpaper yourself easy.

Step 1: Preparation
Good preparation is essential before you start applying non-woven wallpaper. Make sure the surface is well-prepared and that you have the right supplies at hand. In the list below, you will find an overview of products that are suitable for applying non-woven wallpaper. Bring your own tools such as a spirit level, ruler, scissors, and voltage tester.
Prepare your wall by turning off the power and checking that you’ve turned off the correct groups. Remove covers from light switches and outlets. If the wall has imperfections, I recommend repairing it. It is also advisable to make the surface even in color, so that no color difference is visible between the non-woven wallpaper and the wall.
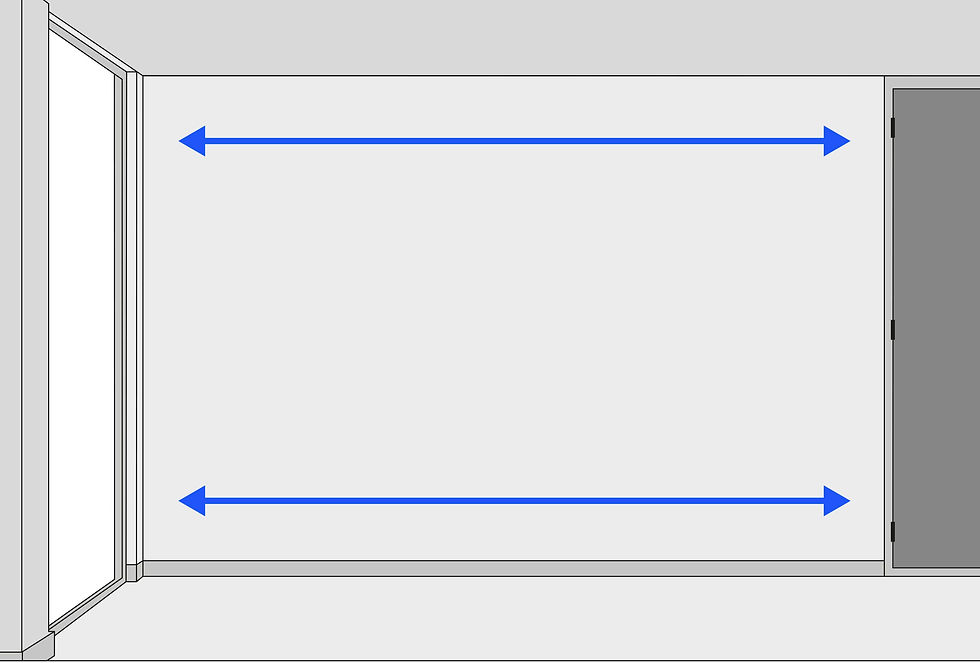
Then draw a perpendicular line as a reference point. You can use the door frame for this, or measure the total width of the wall and determine at what distance from the corner you want to place the straight line. These steps are essential for an optimal process of wallpapering with non-woven wallpaper.
Tip: Start wallpapering from the window side to prevent the light from striking too much. In this way, any seams are less noticeable.
Step 2: Applying non-woven wallpaper
Now that you have completed the preparation, you can start applying non-woven wallpaper. First apply the non-woven wallpaper glue to the wall. Apply more than one web width at one time. This also allows you to see how well the wall absorbs the adhesive. If the wall absorbs a lot of glue, apply another coat of non-woven wallpaper glue.
Use the perpendicular line drawn earlier as a starting point. Stick the first strip of non-woven wallpaper tightly along this line. Press the wallpaper with a wallpaper spatula and a dry cloth. After you have successfully applied the first strip, cut off the excess wallpaper at the top and bottom using a ruler and a utility knife. Repeat these steps when applying the following strips. To connect seamlessly, simply stick the strips together.
Step 3: Paste the last track
You are almost done applying non-woven wallpaper. Before you start applying the last strip, measure how much space you have left. Cut the roll of wallpaper with scissors to the correct width plus some extra. Leaving the wallpaper slightly wider makes it
easier to apply the strip and cut it to size later.
Step 4: After cutting out the sockets
Also stick the wallpaper over the sockets and switches. Rub the circumference firmly. Then cut out the centerpiece with a Stanley knife.
Comments